

Introduction
You have a crisp JPG image on your screen. A logo, a piece of artwork, maybe a custom design you drew yourself. You want to stitch it out on your Husqvarna Viking machine, and you have heard that all you need to do is Convert JPG to HUS Embroidery Files. So you search for a free online converter, upload your image, download the file, and hit start on your machine.
Then disaster strikes. The needle snaps. The thread bunches up. The design comes out looking like a tangled mess instead of the crisp logo you expected.
I have been there. It is frustrating, and it wastes time, thread, and fabric. Here is the truth that no quick converter website tells you. You cannot just click a button and turn a picture into a perfect embroidery file. Embroidery machines do not read images like your phone does. They read stitch instructions . A JPG is a grid of colored pixels. A HUS file is a detailed roadmap for your needle.
But do not worry. Learning to do this the right way is not as hard as you think. Let me walk you through exactly how to get smooth, detailed, and professional stitching from your JPG files.
Why HUS Files and Why Bother
Let us start with the basics. HUS stands for Husqvarna Viking Embroidery Format . It is the native language of Husqvarna Viking embroidery machines. This file tells your machine where to put every single stitch, when to change thread colors, when to trim the thread, and what type of stitch to use.
Your JPG has none of that information. A JPG is just a picture. So you cannot simply rename the file or run it through a basic image converter. You need to digitize it, which means translating the visual information into stitch-by-stitch commands .
Think of it this way. A JPG is like a photo of a house. A HUS file is like a blueprint with measurements, materials, and construction steps. You cannot build a house from a photo alone. And you cannot embroider a design from a JPG alone.
The good news is that once you understand this process, you have full control over the final result. You can adjust density for different fabrics, fine-tune edges for small text, and ensure the design stitches out smoothly every time.
The Hard Truth About Online Converters
I need to be straight with you about something. If you search for free online JPG to HUS converters, you will find plenty of them. But here is what they do not tell you.
Many of these so-called converters do not actually create proper embroidery files. They might redirect you to ads, try to steal your data, or simply rename your JPG file with a .hus extension and call it a day . Your machine will reject that file immediately because it contains no stitch data.
Even the ones that attempt to auto-digitize usually produce poor quality results. Auto-digitizing algorithms are still quite basic. They work for extremely simple, single-color designs, but anything with detail, multiple colors, or small text will stitch out looking jagged and unprofessional . The software does not understand fabric pull, stitch density, or underlay. It just guesses.
So if you value your time, your thread, and your fabric, skip the free online converters. They are not worth the frustration.
Software Options for Real Results
If you want professional results, you need proper digitizing software. Let me break down your options from most powerful to most beginner-friendly.
Wilcom Embroidery Studio
This is the gold standard in the embroidery world . Professional digitizers use Wilcom because it gives you complete control over every single stitch. You can adjust pull compensation, set stitch angles, add underlay, and fine-tune density. The learning curve is steep, and the price tag is high, but if you run a commercial embroidery business, this is the tool you want.
Hatch Embroidery Software
Hatch is made by the same company as Wilcom, but it is designed for beginners and hobbyists . It has much of the same power but with a friendlier interface and a lower price point. This is what I recommend for serious home users or small business owners who want professional results without the professional price tag.
SewArt
SewArt is a budget-friendly option that still gets the job done . It supports HUS output and offers both auto-digitizing for quick conversions and manual tools for fine-tuning. If you only need to convert a few designs a month and you do not want to spend hundreds of dollars, SewArt is a solid choice. It supports input formats like JPG, PNG, BMP, and even vector files like SVG .
Ink/Stitch
This is a free, open-source plugin for Inkscape . It is great for basic digitizing, but direct HUS export can be tricky. You might need to export to another format first and then convert that to HUS using a separate tool. It has a steep learning curve, but it costs nothing, so it is worth exploring if you have more time than money.
Embird
Embird is another affordable option that has been around since 1997 . It is modular, meaning you buy the base software and add features as you need them. It supports HUS export and offers both manual and auto-digitizing options.
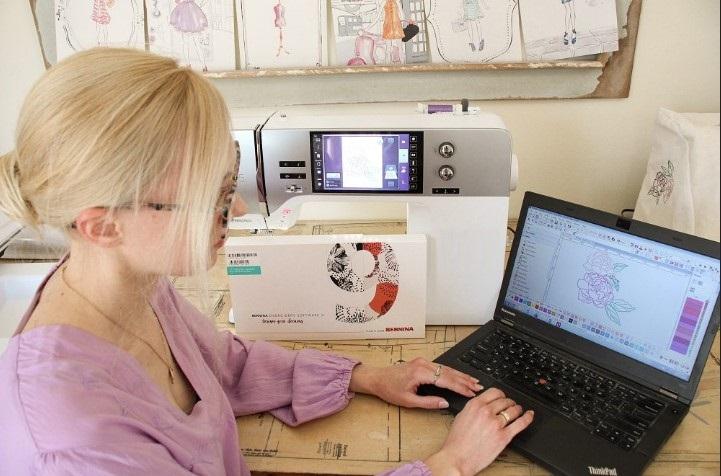
Step by Step Guide to Convert JPG to HUS
Let me walk you through the actual process using professional digitizing software. I will use SewArt as an example because it is affordable and accessible, but the general steps apply to any software.
Step 1: Start with a Clean Image
This step matters more than you think. Open your JPG in a simple photo editor like GIMP, Paint.NET, or even MS Paint. Crop away any extra background. Increase the contrast so the edges are sharp. If your image has gradients or soft shadows, simplify them into solid colors. Remove any small details that will not translate well to thread .
The best source images for embroidery are vector files like SVG or high-resolution PNGs, but a well-prepared JPG works fine. Aim for simple shapes, bold lines, and solid colors.
Step 2: Import Your Image
Open your digitizing software and import the cleaned image. SewArt reads JPG, PNG, BMP, GIF, and even SVG files . Once the image is loaded, set the size to match your desired stitch-out dimensions. Make sure it fits within your hoop. Nothing is worse than digitizing a beautiful design only to realize it is two inches wider than your hoop.
Step 3: Digitize the Image
Now comes the actual work. If your software has auto-digitizing, you can start there for simple designs . The software will analyze the image and create stitch paths automatically. But here is the pro tip. Auto-digitizing is just a starting point. You will almost always need to make manual adjustments.
You need to assign the right stitch types to different parts of the design. Use satin stitches for borders and thin lines. Use fill stitches for large solid areas. Use running stitches for tiny details .
Set your stitch density carefully. For most fabrics, a density of 0.40 to 0.45 millimeters works well. Too dense, and the fabric will pucker or the needle will break. Too loose, and the design will look sparse and see-through.
Add underlay stitches. These are the foundation stitches that go down first. They stabilize the fabric and prevent the top stitches from sinking in. Different fabrics need different underlay. A thick fleece needs more underlay than a stable woven cotton.
Adjust pull compensation. When your machine stitches, the thread pulls on the fabric. Without compensation, a circle becomes an oval. Professional digitizers account for this movement before it happens.
Step 4: Preview the Design
Most digitizing software includes a simulation or preview feature. Use it. This shows you how the design will look when stitched onto fabric . Look for gaps, overlaps, or irregular stitch paths. Pay attention to the color sequence. Does the software group colors logically to minimize thread changes? If not, rearrange them manually.
Step 5: Save or Export as HUS
Once you are happy with the preview, export the file. In SewArt, you select HUS from the output format dropdown . In other software, look for Export or Save As and choose HUS from the list of embroidery formats.
Save a working copy in your software's native format first, like EMB or SVG. This allows you to make edits later without starting from scratch . Then export the HUS file to a location you can easily find.
Step 6: Test on Scrap Fabric
Here is the step that beginners skip and professionals never miss. Before you stitch onto your final garment, test the HUS file on scrap fabric. Use the same stabilizer, the same thread type, and the same fabric type as your final project . Run the design and watch carefully. Does it stitch smoothly? Do the color changes happen correctly? Does the design look clean and detailed?
If something looks wrong, go back to your software, make adjustments, and test again. It might take two or three tries to get it perfect. That is normal. That is how professionals work.
When to Outsource Instead
Let me be honest. Digitizing takes time to learn. If you only need a few HUS files per month, or if your designs are highly complex with small text and many colors, outsourcing to a professional digitizing service might be the smarter move.
Professional digitizing services employ skilled digitizers who use software like Wilcom to create high-quality HUS files . You send them your JPG, tell them your fabric type and hoop size, and they send back a ready-to-stitch file. Turnaround is usually between two and twelve hours, and prices start around ten dollars per logo .
Absolute Digitizing and Digitizing Buddy are two trusted services in this space . They handle the hard work so you can focus on stitching.
Common Mistakes to Avoid
I have made every mistake on this list so you do not have to.
Skipping the test stitch. This is the number one cause of ruined garments. Always test on scrap fabric first.
Using a low-resolution JPG. Pixelated images produce jagged stitches. Start with a clean, high-resolution file.
Forgetting about hoop size. Double-check your hoop dimensions before you start digitizing.
Ignoring fabric type. A design that stitches beautifully on a woven cotton will pucker on stretchy knit. Adjust your density and underlay accordingly.
Trusting free online converters. They promise one-click conversion but deliver frustration and wasted materials.
Conclusion
Converting JPG to HUS embroidery files for smooth and detailed stitching is not a one-click magic trick. It requires the right software, a clean source image, and a willingness to test and adjust. But once you learn the process, you gain complete control over your embroidery results.
Start with a solid budget-friendly option like SewArt or invest in Hatch if you plan to digitize regularly. Prep your images carefully. Learn the basics of stitch types, density, and pull compensation. And always, always test on scrap fabric first.
Your Husqvarna Viking machine is a powerful tool. Give it a proper HUS file, and it will reward you with smooth, detailed, professional-looking embroidery every single time. Now go make something beautiful.